

How I use Scrivener
A quick guide to using the writing software for plotting and querying!

Hey there! My name is A.J. Parker. I’m a poet and young adult fiction writer. You can find me on Instagram, Bluesky, X, and of course, here on Substack. Thanks for reading :)
Hello! A.J. here. I was chatting in one of my writers’ groups the other day about how I organize my Scrivener files for fiction projects and wanted to compile all that information in one place, so other people could benefit too!
Finally last year, after over a decade of pining, I splurged and purchased the writing software Scrivener in the hopes it’d inspire me to write more. I was very confused at first, met by a 25,000-word onboarding doc (talk about info-dumping) and a blank page. But I’ve talked about how I’m a panster in past newsletters, and Scrivener has completely changed that around for me.
After digging into some YouTube tutorials and going down some Reddit rabbitholes, I finessed my way into understanding the basic mechanics. There’s a learning curve, yes, but I find it very helpful for plotting as well as preparing to query.
So, today I wanted to share how it’s helping my process and how it can help yours, too. I’ve also made a template you can use. And please if you find this helpful, I would love it if you hit subscribe!
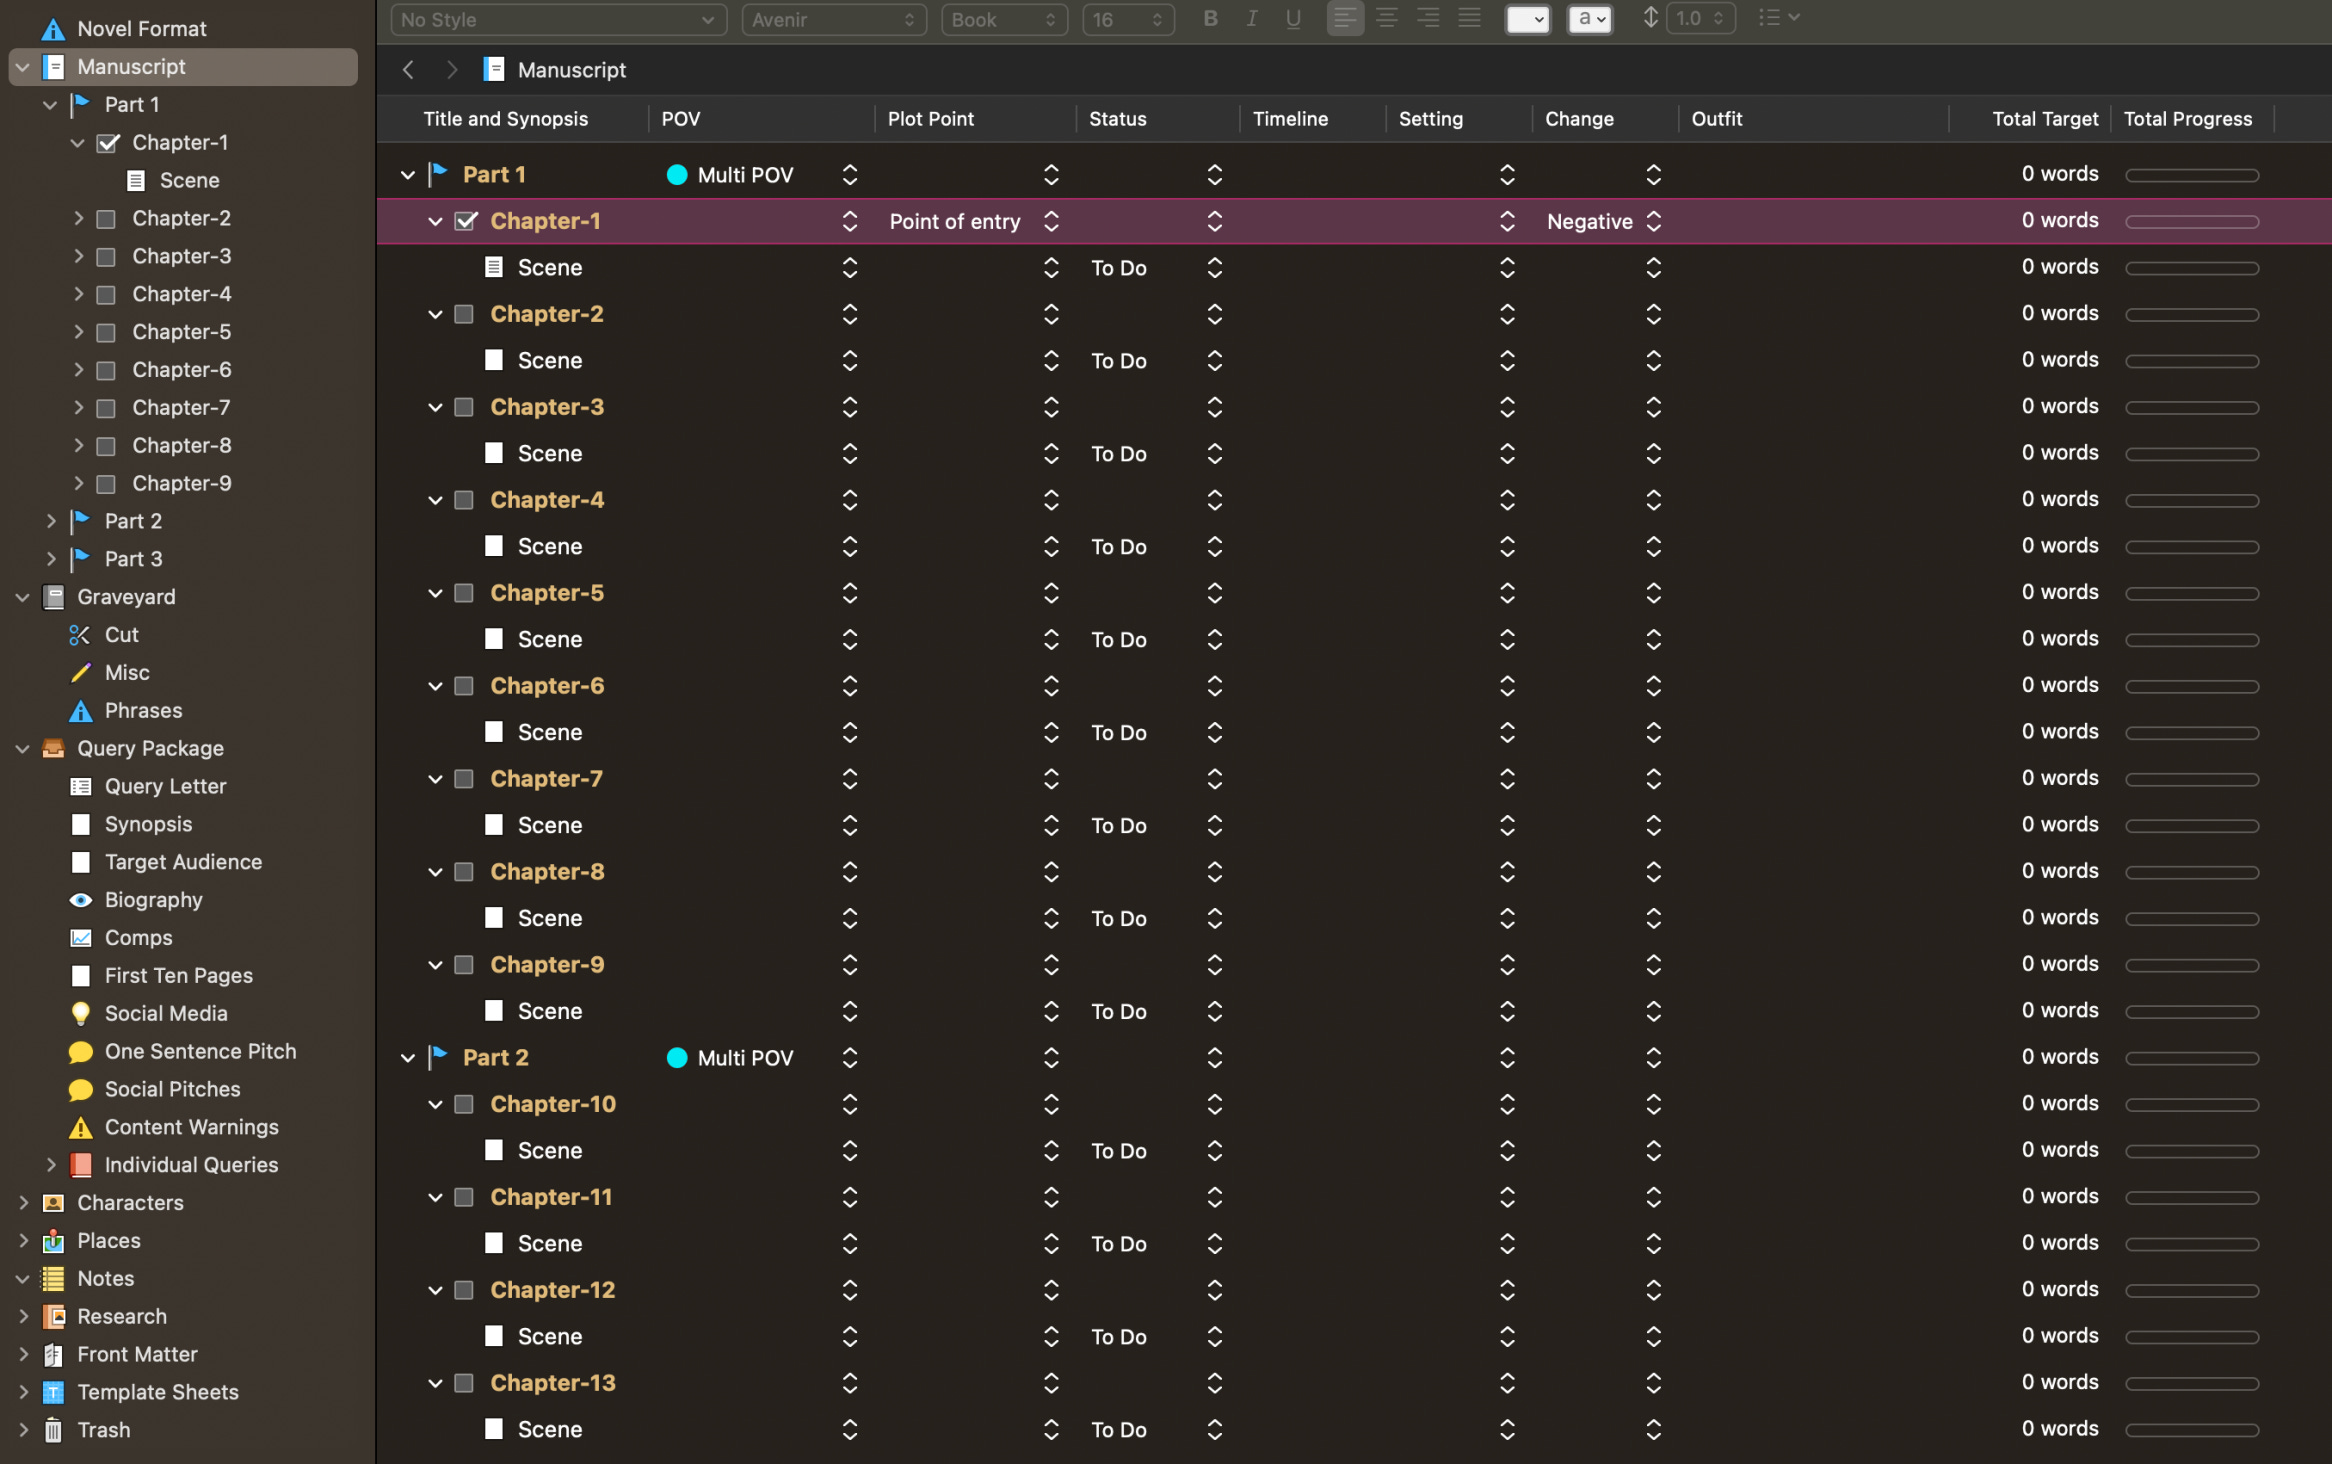
I start by using Scrivener’s “Novel (with parts)” template. This allows you to nestle Scenes within Chapters within Parts within your main Manuscript. I number my Chapters, as I find it hard not knowing what number I’m on, and then if I need to switch content around, I drag-and-drop the Scenes rather than the entire Chapter folder.
After I’ve created shell chapters, I immediately go into the Outliner view. From there, I right click the top bar and check off the sections I want to see, which includes pre-made metadata fields like Title and Synopsis, Project Status, and Total Word Count.
But the best part is adding your own sections.
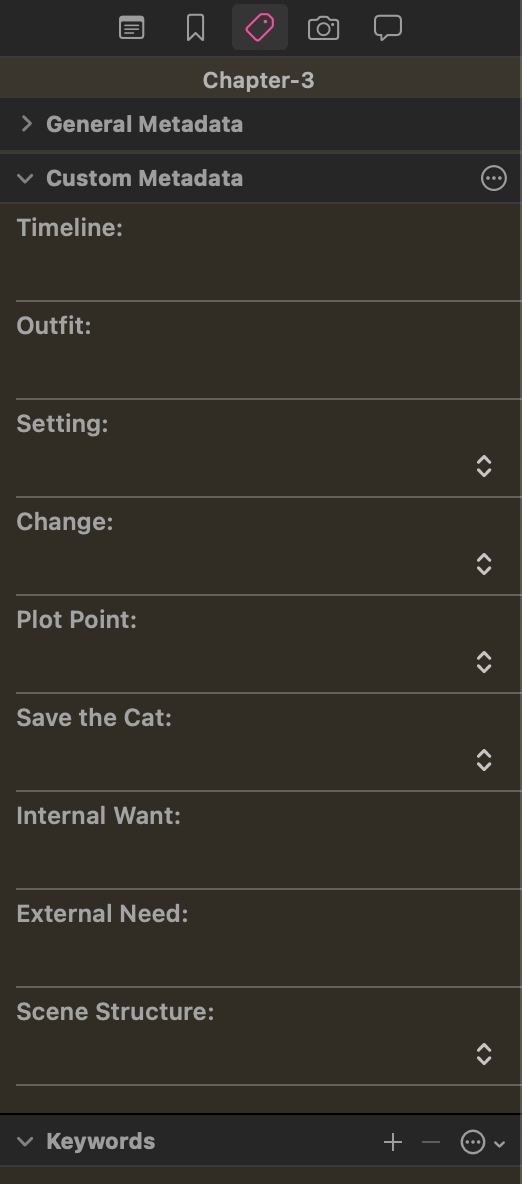
In order to add your own fields, go to Project Settings>Custom Metadata. This metadata will also appear in the third tab of your Inspector bar, as shown below.
I put multiple plotting structures into my projects to help myself keep track of what needs to happen. I mostly use the Save the Cat beats, but I have found eight basic Plot Points helpful for guiding new projects, which include:
Point of Entry
First Plot Point
Rising Action
Midpoint
Second Plot Point
Pre-Climax
Climax
Resolution
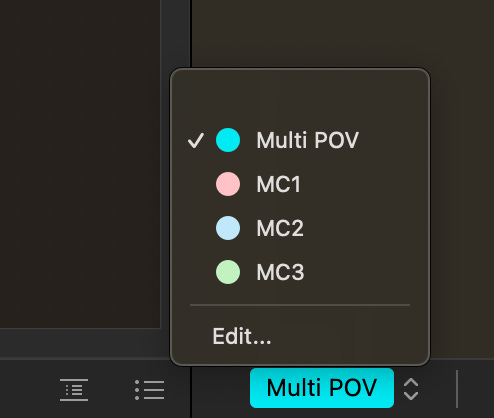
I use the Label List within Project Settings for my POVS, adding a color-coded field for each main character as well as a multi-POV option that I use if there happens to a be a chapter with a perspective shift. (You would label the Scenes with different POVs in that case).
Next, I add a metadata field for Story Change (Positive, Negative, or Flat) and Scene Structure (Action or Reaction). I also have an open-ended text field for Internal Want and External Need, which are handy to fill out if you need some direction within a chapter, though I usually forget to do so.
My most used custom metadata fields are Setting and Timeline. For Setting, I create a dropdown list with established settings that range from the country itself to a specific place within that country. Timeline is usually an open text field. My final (favorite) custom field is the Outfit tab, which allows me to write in what the character was wearing last, since I am a forgetful human being who cannot remember if I put my characters in linen or cotton or silk.
Going back to my Binder (all of the stuff in the very left-hand column), I have a section directly under my full Manuscript devoted to what I call the “Graveyard.” It’s content that has either been cut or not yet used.
I should probably call this the Zombie Graveyard, as usually I put content in there that I’d like to resurrect. Think whole descriptive paragraphs that didn’t work where they had been, but could work elsewhere. More trivial editing changes I keep track of by using Scrivener’s Snapshot feature in the fourth bar of Inspector, which records exactly what the Scene looked like at the time of the Snapshot. You can then compare it to past or future versions.
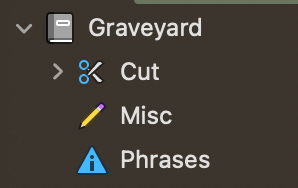
At times, I have moved whole Scenes or Chapters underneath the “Cut” tab. This is because I refuse to truly ever cut anything–it always lives on in some way in case I need to reference it later. “Misc” serves as a chaotic compilation of random drabbles that I source when I need inspiration. At some point, I added a tab called “Phrases” as well, which was a place during edits to look out for overly used phrases.
In every project, I also have a section for my Query Package, as sometimes it’s good to get ahead of your package even if the story is unfinished. Laying it out like this makes it easy to copy-paste over when submitting to agents on QueryTracker, since sometimes they leave open fields for things like Target Audience, One Sentence Pitch, and Social Media Handles.
Here’s what I include (which fun fact, you could also easily copy-paste over to your own Scrivener file):
Query Letter
Synopsis
First Ten Pages
Target Audience
Biography
Comps
Social Media Handles
One Sentence Pitch
Social Pitches
Content Warnings
Individual Queries
Agent Template
Agent 1 Letter
Agent 2 Letter…
Note for Individual Queries, I copy-paste my original Query Letter over, then customize it for each agent: “Dear [AGENT,] I am submitting [NOVEL] to you because…” This is an easy way to keep track of what pitch I submitted to what agent.
The other features I use are included from Scrivener’s Novel template, but I have made some Template Sheets of my own for chapters and epigraphs. Speaking of templates, I’ve made a Scrivener Template with all the features I mentioned above over on a (free) Patreon, since I can’t share files here on Substack.
My biggest complaint with Scrivener is that I find it hard to search the project thoroughly for references to things I’ve written, which I think is because the software wants you to use “Keywords” instead. That being said, I don’t regret downloading Scrivener one bit (and no one is paying me to say this). It’s incredibly helpful for drafting series when you want to keep all your notes in one place.
Hopefully you found this quick run-through of how I do things helpful in some way! If you have any questions, let me know in the comments. Maybe I’ll even do a Part 2!
-a.j. <3
(This newsletter is dedicated to Hedy for hyping me up lol. Go follow them on X!)
Where you can find me:
Three of my poems recently published in Synkroniciti’s “Audacity” issue

Cool to see how others use Scrivener!
I also started using it to organise longer works but now I also like to collect shorter works. For example, I have one Scrivener file for each of my wip novels and thematic collections of short stories, and then I have a Scrivener file for each category of shorter works like standalone poetry and very short fiction.
A nice, informative post. Thanks for sharing, AJ!